Tuesday, August 29, 2017

Peyote Heart Earrings by Met Innmon

Met's engineering skills always shine through her designs.  CRAW  hearts seem to be the norm, but here Met gives us a peyote version where the placement of beads creates the shape.  I love a project that can be done fairly quickly which also provides some learning and can be made in different sizes.  Thanks Met!  Marcia


My Bead Love contribution is a sweet little open heart made with peyote stitch and two different bead sizes. Using size 11 and size 15 seed beads in carefully selected positions, stitches made with single beads or multiple beads and areas where you pass through beads without adding new ones creates these heart shaped earrings. 


Supplies for a pair of earrings … 
You will need size 11 and size 15 seed beads in the same color and finish. 

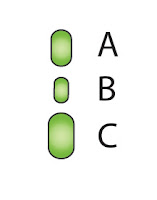
3 grams of size 11 seed beads (A) 
1/2 gram of size 15 seed beads (B)
2 size 8 beads (C) Note: These are used to attach the split rings. 
2 6mm split rings
2 ear wires
Beading thread One G, KO or Fireline 6lb. 
Size 10 or 11 beading needle

Each earring measures 1" by 7/8" (2.5cm by 2.3cm) without the split ring and ear wire.


Here are the bead numbers used in the earrings … 
Size 11 D4208 Duracoat Galvanized Berry 
Size 15 D4208 Duracoat Galvanized Berry 
Size 8 D4208 Duracoat Galvanized Berry 


Tips for using the visual cues in the diagrams …
  • The thread path is a bold red line starting at a little black dot and ending with a bold red arrow.
  • The beads stitched in the step are outlined in bold red. 
  • The beads passed through (not added in the step) are outlined in bold black. 


Pull a 3 and 1/2 foot (107 cm) length of thread.

Row 1 and 2: String 36A. Needle through the first 2 beads again in the same direction making a ring. Slide the ring of beads down the thread leaving a 1 and 1/2 foot (46 cm) tail thread. The tail thread will be used later. 


With a medium tension … 
Row 3: Using A, make 18 peyote stitches. Step up into the first bead stitched in this row. 


Row 4
  • Without a bead, needle into the next high bead. This is a decrease area and defines the top center of the heart.  
  • Make 3 peyote stitches each with 2A. 
  • Make 5 peyote stitches each with 1A. 
  • Make 1 peyote stitch with 2A. This is the bottom of the heart. 
  • Make 5 peyote stitches each with 1A. 
  • Make 3 peyote stitches each with 2A. 
  • Pass the needle through the decrease at the top center of the heart. 
  • Step up into two beads (the first 2A). 

Row 5
  • Make 1 peyote stitch with 1A needling into 2A’s. 
  • Make 1 peyote stitch with 1A needling into 2A’s. 
  • Make 3 peyote stitches each with 1A. 
  • Pass the needle through 6A (low/high). This positions the thread in the 1st of the 2 beads at the bottom of the heart. 
  • Pick up 1A and needle into the 2nd of the 2 beads at the bottom of the heart. 
  • Pass the needle through 6A (low/high). 
  • Make 2 peyote stitches each with 1A. 
  • Make 1 peyote stitch with 1A needling into 2A’s. 
  • Make 2 peyote stitches each with 1A needling into 2A’s. 
  • Without a bead, needle though 1 bead and the decrease area at the top of the heart. 
  • Step up into the 1st bead in the 2 bead pair. 


Row 6
  • Make 1 peyote stitch with 1B and 1A. 
  • Make 1 peyote stitch with 2A and 1B. 
  • Make 1 peyote stitch with 2A and 1B. 
  • Make 1 peyote stitch with 1A and 1B. 
  • Make 1 peyote stitch with 1B. Note: Use a little tighter tension to help the size 15 seed bead fill the space and to hide the thread. The tighter tension will also encourage the heart to curve and have more dimensionality. 
  • Following the outside perimeter, needle through 8 beads (high/low). This positions the thread at the bottom tip. 
  • Following the outside perimeter, needle through 8 more beads (high/low). 
  • Make 1 peyote stitch with 1B. Note: Use a little tighter tension to help the size 15 seed bead fill the space and to hide the thread. The tighter tension will also encourage the heart to curve and have more dimensionality. 
  • Make 1 peyote stitch 1B and 1A. 
  • Make 1 peyote stitch with 1B and 2A. 
  • Make 1 peyote stitch with 1B and 2A. 
  • Make 1 peyote stitch with 1A and 1B needling into the 2nd bead of the 2 bead pair. 


Adding the Size 8 bead for hanging the split ring
  • Pass the needle through 1A, the decrease area, 1A, 1B and 1A. This positions the thread near the top on one side of the heart. 
  • Make 1 peyote stitch with 1C. 
  • Needle through the low/high beads around the outer perimeter to reinforce the stitching. Note: If you want the heart to have more dimensionality use a tighter tension while reinforcing these beads. 
  • Secure the thread and cut. 
Do not cut the tail thread yet. It will be used next.  


This row is worked on the inside perimeter of the heart with the tail thread. 
Row 7:
  • Needle through 8 beads (low/high).
  • Make 3 peyote stitches each with 1B. 
  • Without a bead, needle into the next high bead. This is a decrease area and defines the inside point at the bottom of the heart. 
  • Make 3 peyote stitches each with 1B. 
  • Needle through 10 beads moving back toward the top of the heart. 
  • Make 1 peyote stitch with 2A.


  • Reinforce the inside perimeter by needling through the 34 low/high beads until you get back to the inside top of the heart. This positions the thread in the 1st bead of the 2 bead pair at the inside top of the heart. 
  • Make 1 peyote stitch with 1A into the 2nd bead of the 2 bead pair splitting the 2 bead pair.


Secure the tail thread and cut. 
  • Open a split ring and insert into the size 8 bead. 
  • Open the loop on an ear wire. 
  • Insert the split ring into the ear wires loop and close the loop on the ear wire. 
Make a second earring. 


Earlier in the year, I beaded Marcia's Love & Hope letters and put them together in a crossword. They decorate my bead studio color wall. Now, a small heart and two large hearts accompany Love & Hope! Here are instructions to make a large peyote heart.


Large Peyote Heart 

Supplies needed for one large peyote heart … 
You will need size 11 and size 15 seed beads in the same color and finish. 

2 grams of size 11 seed beads (A) 
1/2 gram of size 15 seed beads (B)
Beading thread One G, KO or Fireline 6lb. 
Size 10 or 11 beading needle

The large heart measures 1 1/8" by 1 1/2" (3cm by 3.8cm).

Here are the bead numbers used in the blue hearts accompanying Marcia’s Love and Hope letters… 
Size 11 F463Z
Size 15 F463Z

and the teal heart accompanying Marcia’s Love & Hope letters … 
Size 11 377I 
Size 15 377I 


Pull a 4 foot (122 cm) length of thread. 

Row 1 and 2: String 44A. Needle through the first 2 beads again in the same direction making a ring. Slide the ring of beads down the thread leaving a 1 and 1/2 feet (46 cm) tail thread. The tail thread will be used later. 


With a medium tension … 
Row 3: Using A, make 22 peyote stitches. Step up into the first bead stitched in this row. 

Row 4
  • Without a bead, needle into the next high bead. This is a decrease area and defines the top center of the heart.  
  • Make 5 peyote stitches each with 2A. 
  • Make 5 peyote stitches each with 1A. 
  • Make 1 peyote stitch with 2A. This is the bottom of the heart. 
  • Make 5 peyote stitches each with 1A. 
  • Make 5 peyote stitches each with 2A. 
  • Pass the needle through the decrease at the top center of the heart. 
  • Step up into two beads (the first 2A). 

Row 5
  • Make 4 peyote stitch with 1A needling into 2A’s. 
  • Make 3 peyote stitch each with 1A. 
  • Pass the needle through 6A (low/high). This positions the thread in the 1st of the 2 beads at the bottom of the heart. 
  • Pick up 1A and needle into the 2nd of the 2 beads at the bottom of the heart. 
  • Pass the needle through 6A (low/high). 
  • Make 2 peyote stitches each with 1A. 
  • Make 1 peyote stitch with 1A needling into 2A’s. 
  • Make 4 peyote stitches each with 1A needling into 2A’s. 
  • Without a bead, needle though 1 bead and the decrease area at the top of the heart. 
  • Step up into the 1st bead in the 2 bead pair. 

Row 6
  • Make 1 peyote stitch with 1B and 1A. 
  • Make 1 peyote stitch with 2A and 1B. 
  • Make 1 peyote stitch with 2A and 1B. 
  • Make 1 peyote stitch with 2A and 1B. 
  • Make 1 peyote stitch with 1A and 1B. 
  • Make 1 peyote stitch with 1B. Note: Use a little tighter tension to help the size 15 seed bead fill the space and to hide the thread.
  • Following the outside perimeter, needle through 10 beads (high/low). This positions the thread at the bottom tip. 
  • Following the outside perimeter, needle through 10 more beads (high/low). 
  • Make 1 peyote stitch with 1B. Note: Use a little tighter tension to help the size 15 seed bead fill the space and to hide the thread. 
  • Make 1 peyote stitch 1B and 1A. 
  • Make 3 peyote stitch with 1B and 2A. 
  • Make 1 peyote stitch with 1A and 1B needling into the 2nd bead of the 2 bead pair. 
Secure the thread and cut. 

This row is worked on the inside perimeter of the heart with the tail thread. 
Row 7:
  • Needle through 10 beads (low/high).
  • Make 4 peyote stitches each with 1B. 
  • Without a bead, needle into the next high bead. This is a decrease area and defines the inside point at the bottom of the heart. 
  • Make 4 peyote stitches each with 1B. 
  • Needle through 12 beads moving back toward the top of the heart. 
  • Make 1 peyote stitch with 2A. 
  • Reinforce the inside perimeter by needling through the 42 (low/high) beads until you get back to the inside top of the heart. This positions the thread in the 1st bead of the 2 bead pair at the inside top of the heart. 
  • Make 1 peyote stitch with 1A into the 2nd bead of the 2 bead pair splitting the 2 bead pair. 

Secure the thread and cut. 

For a printable version click here.


Thank you for beading my little peyote heart earrings! I hope you enjoyed the design and enjoy wearing the earrings.  Met 

met@metbeads.com 
www.metbeads.com


Tuesday, August 22, 2017

The LOVE Bracelet by Linda Roberts

Linda has been a friend for many years now.  As so often is the case, we became familiar with one another on Facebook.  Then we got to meet in person at Bead and Button where one's passion for beads often comes together with others.  Then I was lucky enough that she moved not far away and we got to bead together on a regular basis.  I admire Linda's breadth of mediums and it's been my pleasure to watch some of her bigger art pieces develop.  Here she gives us a tiled bracelet with the sentiment that started it all.....LOVE!  Marcia


I find that with beading, one idea often leads to another idea.  I saw the free beading project for July from Bead and Button Magazine and thought it might be a good project (skipping the resin part) for my beading group.  I hadn't yet taught them odd count peyote and it looked like a fun project.


I used the software program BeadTool to create my own 1 inch square design using size 11° Delica beads.  To make the beadwork fit inside a 25mm square pendant, the width of my beadwork used 19 Delica beads and the length used 15 Delica beads.  After beading, it is turned to fit the correct way inside the pendant and glued in place.  I gave the beaders peyote graph paper and they had a choice to design their own initial, or use the breast cancer awareness ribbon design I created for them.

While I was beading up a sample of my initial L for the class, the thought came to me that I could also create the letters O, V and E and make a LOVE bracelet for my Bead Love project. Since each letter component is approximately 1" square, four would not be long enough for a bracelet, so I also created a heart design and added a few rows to connect the squares.

Odd count peyote patterns allow for designs to be symmetrical on both sides of a center line.  But because there is not an even number of beads in each row, it is necessary to do a special turn around on one side of the peyote beadwork.  There are several You Tube videos available to watch to show you how to do the turn around.  Google "odd count peyote" to find them.

The bracelet is made with size 11° Delica beads, 6 lb fireline and a size 11 needle.  A Bead Legend and Chart, as well as a Word Chart for the heart and for each LOVE letter follows. Each design begins on the upper left hand side, and each row begins and ends with a black bead.   Even though the diagrams show each component separately, It is not necessary to bead them separately.  When finished with one, simply continue on with the next, noting that Rows 1 and 2 will be added separately.  The heart and four letters spelling LOVE all connected will be approximately 5 1/2" (14cm) long.  If the bracelet needs to be longer, it's easy to add another heart square at the other end, or add additional beads to each end of the bracelet.  Remember that your clasp will also add to the length of your bracelet.


Finish your bracelet by adding a clasp of your choice.  Then enjoy wearing it, or give it as a gift of love to someone special.

To get a printable version click here.

Linda Roberts
https://www.etsy.com/shop/beadsforever


Tuesday, August 15, 2017

A Love Knot by Jacqui Higgins

Jacqui gives us the lovely concept of a Love Knot worked in one of the most distinctive new beads, the ZoliDuo.  She's turned this love knot into a ring which I'm sure will be as fun to wear as to make.  What color will yours be? Marcia


 Supplies:

10         ZoliDuo Beads  (Right)   Czech
2g.        11° seed beads   Miyuki
1g.        15° seed beads   Miyuki
1           ss29 Rose Montee    Swarovski 1088 in sew on setting (2 parallel holes)
8# Fireline Beading Thread
Size 11  Beading Needle

Step by Step Instructions:
Stitching the LOVE KNOT RING face:
  1. Thread your needle with approx. 36 inches of thread, add a stop bead and leave a 6 inch tail.  
Pass your needle through the left side holes of the rose montee setting, and string 2 zoliduo beads through the pointed end of the beads, and pass down through the right side holes of the rose montee setting. (Fig. 1)
Repeat this stitch to the opposite side of the rose montee setting, and exit the top hole of the rose montee setting where you began. (Fig. 1)


  1. Pass your needle through the adjacent zoliduo bead, and string 3 zoliduo beads through the pointed end of the beads.  
Pass through the 2 adjacent zoliduo beads added in Step 1, and repeat this step to the opposite side of the rose montee. (Fig. 2)

  1. Pass your needle through the pointed end of the 2 adjacent zoliduo beads, and string   1-11° seed bead.
Continue around the rose montee, passing through the pointed end of the zoliduo beads, adding 1-11° seed bead between each set of zoliduo beads added in Steps 1-2,
      for a total of 4-11° seed beads added. (Fig.3)  
      Exit between the second zoliduo bead added in Step 2. 


  1. Reverse direction, and pass through the top hole (round edge) of the zoliduo bead.  Working through the top holes of the zoliduo beads, string 1-11° seed bead, pass through the adjacent zoliduo bead.  Continue added 1-11° seed bead in this manner through all 10 zoliduo beads, for a total of 10-11° seed beads added. (Fig. 4) 


Exit the first  11° seed bead added in this Step, and the adjacent zoliduo bead and reverse direction.

  1. Adding the “KNOT- STITCH” EMBELLISHMENT:
Pass through the pointed end of the zoliduo bead, through to 1-11° seed bead added in Step 3.   String 8-15° seed beads, lay the beads over the 2 zoliduo beads, and pass through the 11° seed bead added in Step 4.  Continue to pass through the top hole of the adjacent zoliduo, 1-11°, (top hole) zoliduo, 1-11° , (top hole) zoliduo, and 1-11° seed bead.  Then pass down to 1-11° seed bead added in Step 3 between the zoliduo beads. (ref. Ring photo for detail)

  1. Repeat Step 5 one more time working in the same direction. When completed, reverse direction and repeat Step 5 twice to complete the Knot-Stitch embellishment.  

  1. Stitching the LOVE KNOT RING band:
Begin stitching one side of the ring band by setting up a 2-bead flat herringbone stitch for 5 rows, at 1 - 11° seed bead on both sides of 1 zoliduo bead added in Step 4.
(Fig. 5)

  1. Join each 2-bead split at row 5, and continue with a 4-bead flat herringbone stitch for the remaining stitches to determine your desired length of the band.  
Note when determining the length of your band, allow for the 5 rows of 2-bead flat herringbone stitch (Step 7) you will add to attach the band to the opposite side of the ring. (Fig. 6)
 For printable directions click here.

JLH Designs Jacqui Higgins

 A bit of history about the LOVE KNOT:
The term true lover’s knot, also called true love knot is used for many distinct knots.  The association of knots with symbolism of love, friendship and affection dates back to antiquity.
Knots in jewelry and their particular focus as a symbol of eternity and love are rare ancient concepts that span both the East and West.  We’re blessed with how prolific they are in mourning and sentimental items for the very nature of their symbolism, but their appearance in different permutations in cultures is ubiquitous and strangely correlating with concurrent meanings.
There are quite a few variations on the knot, one of the more popular being the Celtic knot, which is dated to around 450 CE, which is often referred to as the “mystic knot” or the “endless knot”.  In this, there is the allusion to birth and rebirth.  The expression “tying the knot” is thought to be where the couple had their hands bound in an endless knot as part of the wedding ritual.
Then there is the knot as a primary focus, which is very typical in rings and necklaces.  The knot is most often seen with the Celtic influences, but many second-half 19th century rings retained a knot motif, often seen as a twist, in various styles and materials.  Knots in necklaces were also popular from the 1860’s onwards, with the necklace itself twisting into a knot around the chest.  Chains were also tied into the concept of knots, used in bracelets, necklaces, links in fob chains and other items as well.
1 Wikipedia
2 Various sources
3 Various sources


Monday, August 7, 2017

Sabine Lippert shares her love of Beading!

I have the extremely good fortune to have many friends in the bead world and it's always fun to spend time with them.  I will always remember when I first began seeing the name Sabine Lippert.  Her designs were beautifully executed, with a strong design sense, wonderful coloration and oh man, she was so prolific.  I remember writing her and saying something close to 'Who the heck are you?'  I laugh at those early days and memories.  She of course continued to excel and in short order we met at her first Bead and Button.  She's crazy fun in person and we've continued our friendship ever since. For two beaders who live on opposite sides of the world we manage to see each other a couple of times a year, pretty amazing!  One of my great pleasures of the bead community is spending time with other beaders.  As Sabine will tell you below it's one of hers as well.  Marcia


Do you love beads?
Yes! Definitively yes!
Well…. this is only a piece of glass with a hole (or two or three). You could also say I love vases or windows, hey, windows are even bigger pieces of glass, so what is so special about beads?

I have to confess, that I have not a real good answer to this. All I can say is, that when it comes to beads, I cannot stop drooling about their colors, their shapes, their looks. When I open a drawer full of beads, my mind starts working, starts arranging them in this or that shape, stitch, order, number.
I can talk to someone and suddenly an idea pops up and my mind is gone with the wind… beading!
You don’t find beaders at every corner of the city, but once you find them, you do not hesitate to travel for hours to meet them.

When I first time came to Bead and Button show, the officer at the immigration asked me what the purpose of my visit was. I told him where I am going, he was looking at me like, "All the way over the ocean to meet some people who share your hobby?“

Well…. non beaders will never understand.
The first local meeting of beaders (this is now over 10 years ago) was a fun experience. I just learned how to do bead crochet. Now I saw all the other women, making a show and tell, bringing all their beaded beauties, I saw Peyote, Herringbone and RAW designs for the first time and was lost! At the end of the day, I could make a drawing of every single piece I saw, I could tell you who knew which technique, but I had no single personal information about the women.

Usually when you meet other people, the first thing is "What is your job, where do you live? Are you married? Kids?"

None of that, when you are with beaders. It is one of these places in the world, where the only thing that counts is your desire for beads.

11 years ago I started beading. I was frustrated in my daily job for many reasons. Often I came home in the evening, angry, sad and upset. I closed my door, dropped my bags and jacket and started beading. Within minutes my anger disappeared and I was in the middle of my rainbow unicorn fairy world of beads. It was so soothing and still is. When stress gets too overwhelming, I meditate with my beads. 

When I quit my daily job as a physician years ago to completely dive into the beading world, my former boss asked me "What on earth did you go to university for?"
I said  "It helps me to write nice instructions" but deep inside I just thought "You will never understand, so why bother to explain".

Do you remember the first Rivoli you bezeled? With neat Peyote stitch, do you remember being proud as a peacock? As a teacher I am in the position to see this facial expression in every workshop I make. And that is priceless!

Yes I love beads, I love beading, I love all the friends and friendships that beading brought in my life.
Sabine Lippert
Tulpenweg 56
53757 Sankt Augustin
Germany
www.Trytobead.com